
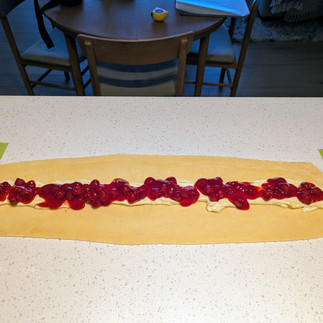
Cherry cheese kringle
- Jan 10, 2025
- 2 min read
Updated: Jan 23, 2025


Recipe
^ baked at 375 instead of 350, for 30 minutes instead of 20.
How it turned out
Really tasty! I was excited to try this because it's a Danish dessert I hadn't heard of and it didn't seem too complicated to make. The hardest part was rolling out the dough to 27". Otherwise, it was a very straightforward recipe with clear instructions. I'm looking forward to trying it with different fillings too.
What I learned
Let it cool completely. When the kringle came out of the oven, it smelled soooo good! I knew I shouldn't ice it until it was completely cooled down, but I simply couldn't wait to dig in. It wasn't hot, but warm to the touch. Even still, that was enough melt the icing right off. Next time I'll be sure to let it sit for at least 45 mins before trying to ice it.
Balance the filling flavours. While it was super tasty, it was very cherry-forward. Even though I made double the amount of cream cheese filling, the cherry still overpowered it. Next time, I'll try a 3:1 ratio of cream cheese to cherry.
Shock the dough with high heat, then turn it down. There was quite a bit of butter leakage during the bake. I was surprised at how low the baking temp was (350) for something with layers of butter, so I bumped it up to 375. I think next time I will preheat my oven to 400, then pop the kringle in and lower it to 350 after 10 mins. I'm hoping shocking the dough with a blast of heat will help the butter to evaporate instead of melt out.

Comments